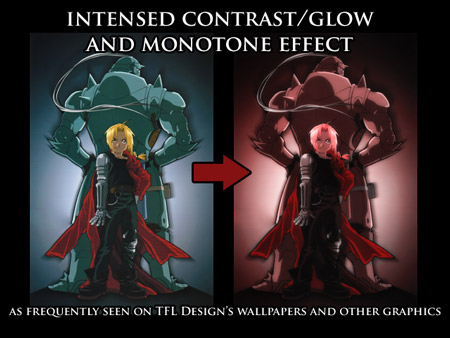
You may have wondered how I make some of my graphics have this eerie/intense glow effect, especially in those that are duotoned/monotoned in color. This tutorial will give a gist of how it’s done and the basics of having your graphic’s end result look less like the original scan- Flat and lifeless…

Using the above image as example, first duplicate the image:
CLICK TO VIEW SCREENSHOT
The top/second layer is now active (As its layer is highlighted a darker grey on the layer palette) and so set that layer’s Blending Options to OVERLAY:
CLICK TO VIEW SCREENSHOT
NOTE : You can use SOFT LIGHT as an alternative to Overlay in some cases. Try both to see which one you like better.
Click back to the bottom/background layer on the palette and go to IMAGE-ADJUSTMENTS>BRIGHTNESS/CONTRAST:
CLICK TO VIEW SCREENSHOT
Now depending on how it’s adjusted, the effects will be different. (Obviously) I prefer having the Brightness adjusted POSITIVE and LOWER than the Contrast. Let’s first set it to Brightness +11 and Contrast -25 to see what I mean.
Now have that same bottom layer FILTER>BLUR>GUASSIAN BLUR to 4.0:
CLICK TO VIEW SCREENSHOT
Back to what I was talking about the results being different. With a higher positive Brightness and lower negative Contrast, we see the lighter portions obviously go brighter, but due to its lower number negative Contrast, it’s a bit too bright. (example- look at the blonde hair) With a positive Brightness and positive Contrast, we get super brights and super darks at the same time. To level this out, I like the middle version the best- balanced in its bright spots and nicely fading to dark- Positive Brightness and Higher Number Negative Contrast:
CLICK TO VIEW SCREENSHOT
This result of this basic effect makes the original image seem cleaner, smoother, and not as paper flat. This next part is to get the monotone colored feel.
Create a new layer and fill it the solid color of your choice. Remember it will create a new layer above your active layer, so be sure to click on the top layer of the palette first before creating a new layer, or simply drag the new layer up in the Layer pallet:
CLICK TO VIEW SCREENSHOT
Now set its Blending Option to HUE:
CLICK TO VIEW SCREENSHOT
YOU’RE DONE!


